As enterprises continue to expand their IT footprint into the public clouds, extending existing private networking infrastructure into the cloud has become more critical. To address the flexibility that this requires, Nutanix has added a Bring Your Own (BYO) Networking feature to its Frame® Desktop-as-a-Service (DaaS) solution. In this blog, I walk you through how a test environment could be set up in an AWS® infrastructure to familiarize a Frame administrator with how this feature works. Integration into an actual private network depends on the specific implementation of that network.
BYO networking is useful when an enterprise wants to grant external or temporary access to internal resources. By leveraging a public cloud service like AWS, an enterprise can “rent” public-facing computing resources and grant users access to files or software anywhere in the world. It can also be used as “surge capacity” to grant more full-term employees access to what they need to perform their jobs, but are denied access to physical locations where the private network has been deployed.
You can find details on the network requirements for using Frame in a BYO networking scenario at Public Cloud with Private Networking.
Requirements for BYO Networking
Frame DaaS requires the following information to deploy BYO Networking to your AWS implementation:
- A Frame customer or organization with an attached AWS subscription (instructions for attaching your AWS to Frame can be found here).
- The virtual private cloud (VPC) ID of the VPC you are deploying to.
- The Subnet ID where the workloads will be deployed (These subnets will need outbound internet access).
- The Security Group that will be attached to the Frame Workload instances.
The figure below illustrates the network architecture of what I created for this blog.
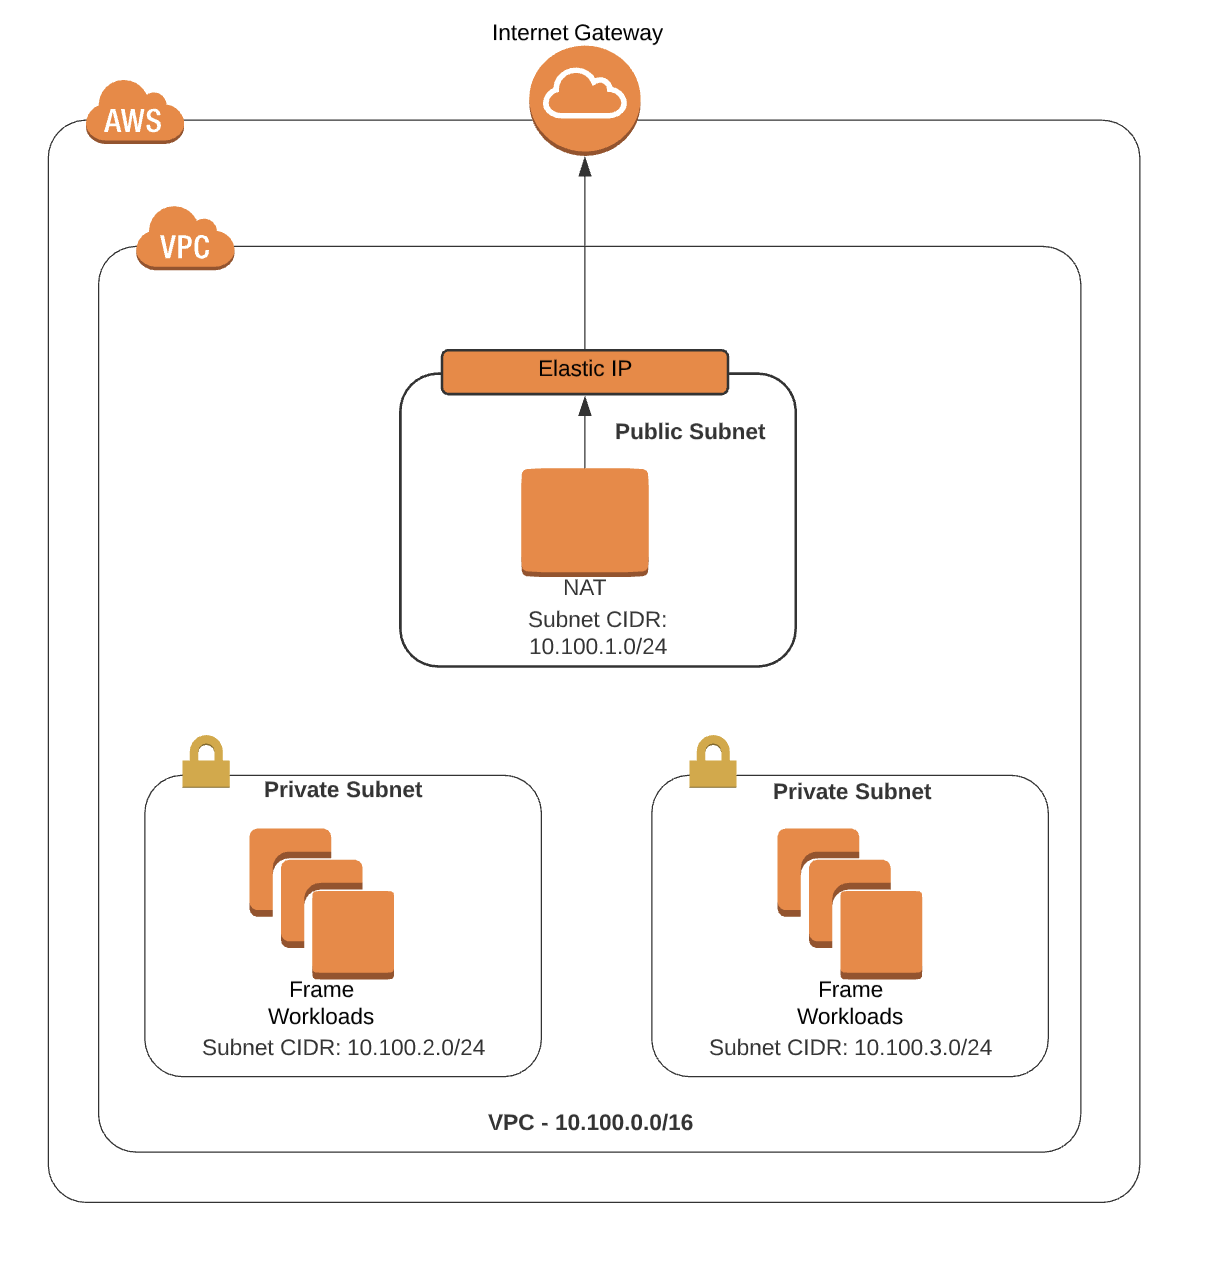
BYO Networking VPC
Create a VPC
The first step is to create a VPC. You can do this from the AWS Web Console from the VPC Service webpage as seen in the figure below. Make sure you are in the correct region (in my test case, Ohio).
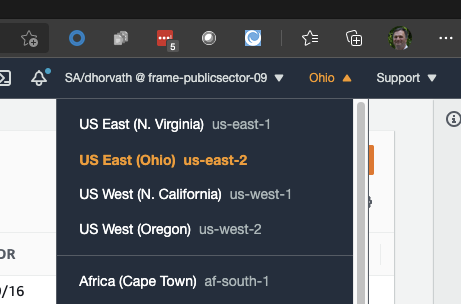
Choose AWS Region
Then choose the “Create VPC” Button. Give your VPC a name and choose a CIDR. The following figure shows that I chose 10.100.0.0/16, because I did not need to worry about connecting this VPC to my private network. If your goal is to eventually connect to your private network, you should work with your networking team to get a CIDR that does not overlap with the rest of your private network. We recommend at least a /18 CIDR be used for the VPC.
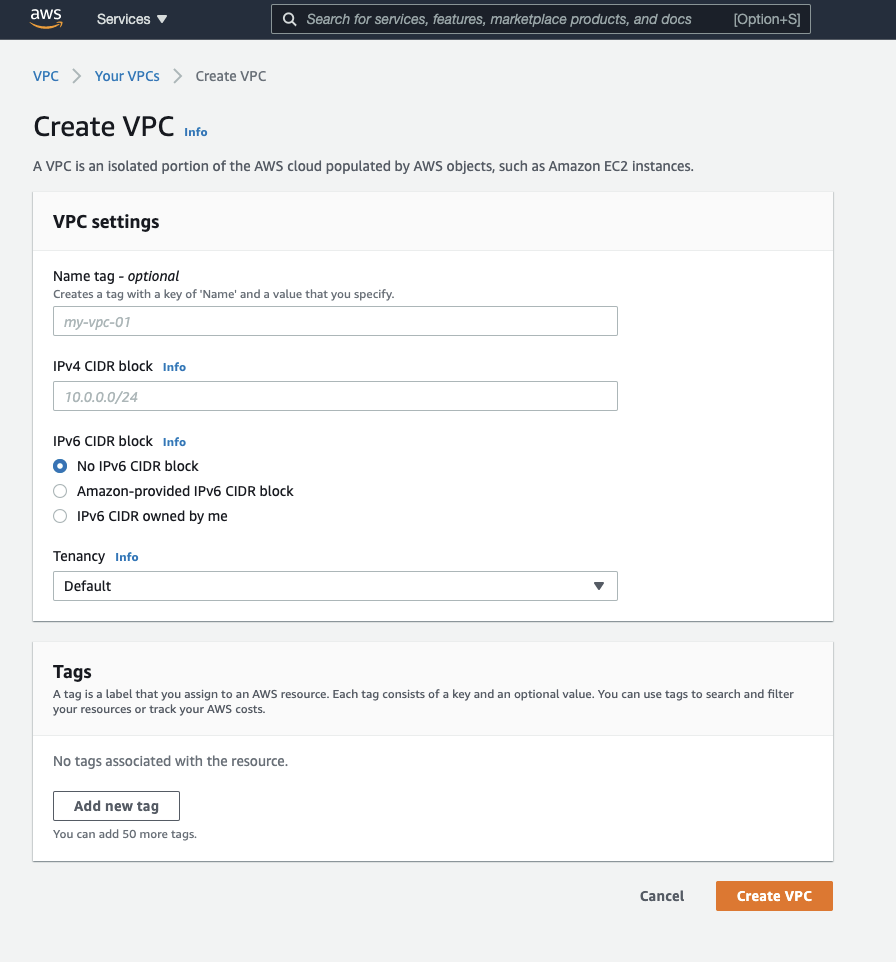
Create VPC Dialog
Create Subnets
The next step is to create the private subnets that will be used for the Frame workloads. In my case, I also created a public subnet for the “DMZ” that connects my private subnets to the internet. This may not be necessary if your enterprise already has an internet connection.
To create a subnet you need to know the VPC, the CIDR range you are going to use, and the availability zone (AZ) you would like to use. Since Ohio has three AZs, I decided to create my public subnet in A and created two private subnets (one in B and one in C). For simplicity, I assigned 10.100.1.0/24, 10.100.2.0/24 and 10.100.3.0/24 to these subnets as shown in the figure below.
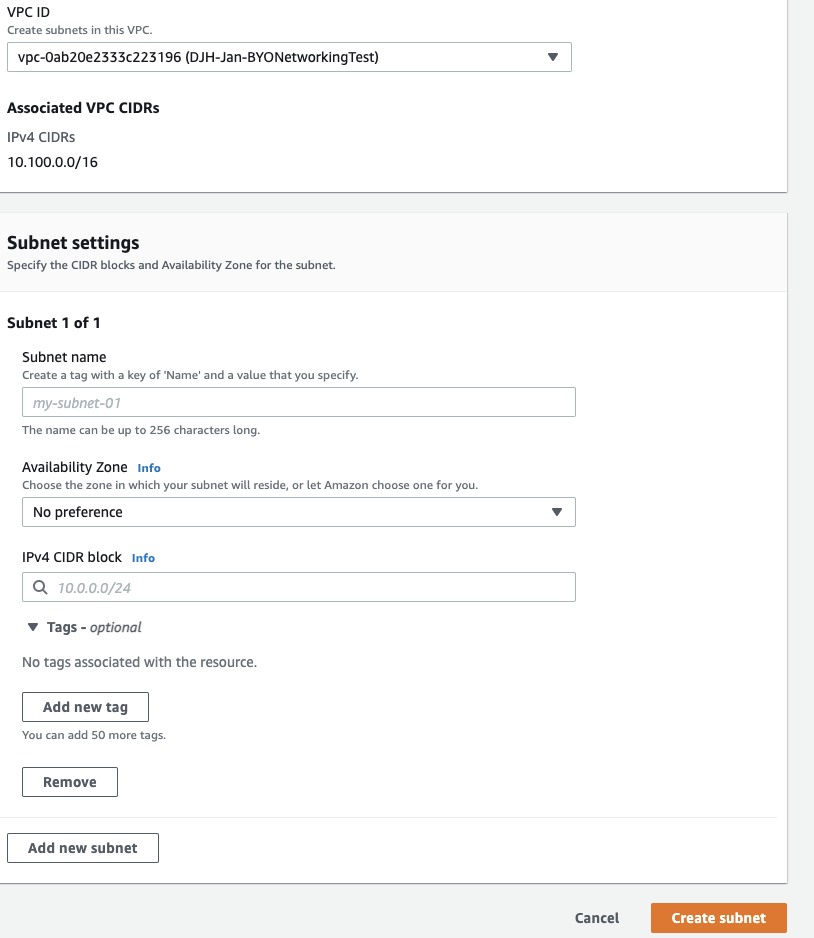
Create Subnet Dialog
Public Subnet Resources
Frame workloads can be on a private network, but they still need to be able to communicate with the internet to the Frame platform to report health and status, as well as to access updated Frame software. To accommodate these requirements in my AWS network architecture, I need to create a “public subnet.” To do this I attach an internet gateway to the VPC and then create a NAT gateway that can be assigned a public IP address. To confirm that my Frame workloads are working, I created an RDP bastion host in the public subnet. This provides RDP access into the private network.
Internet Gateway
In order for my workloads in the private subnet to access the internet, I need to create an internet gateway and attach it to the VPC as displayed in the following two figures.
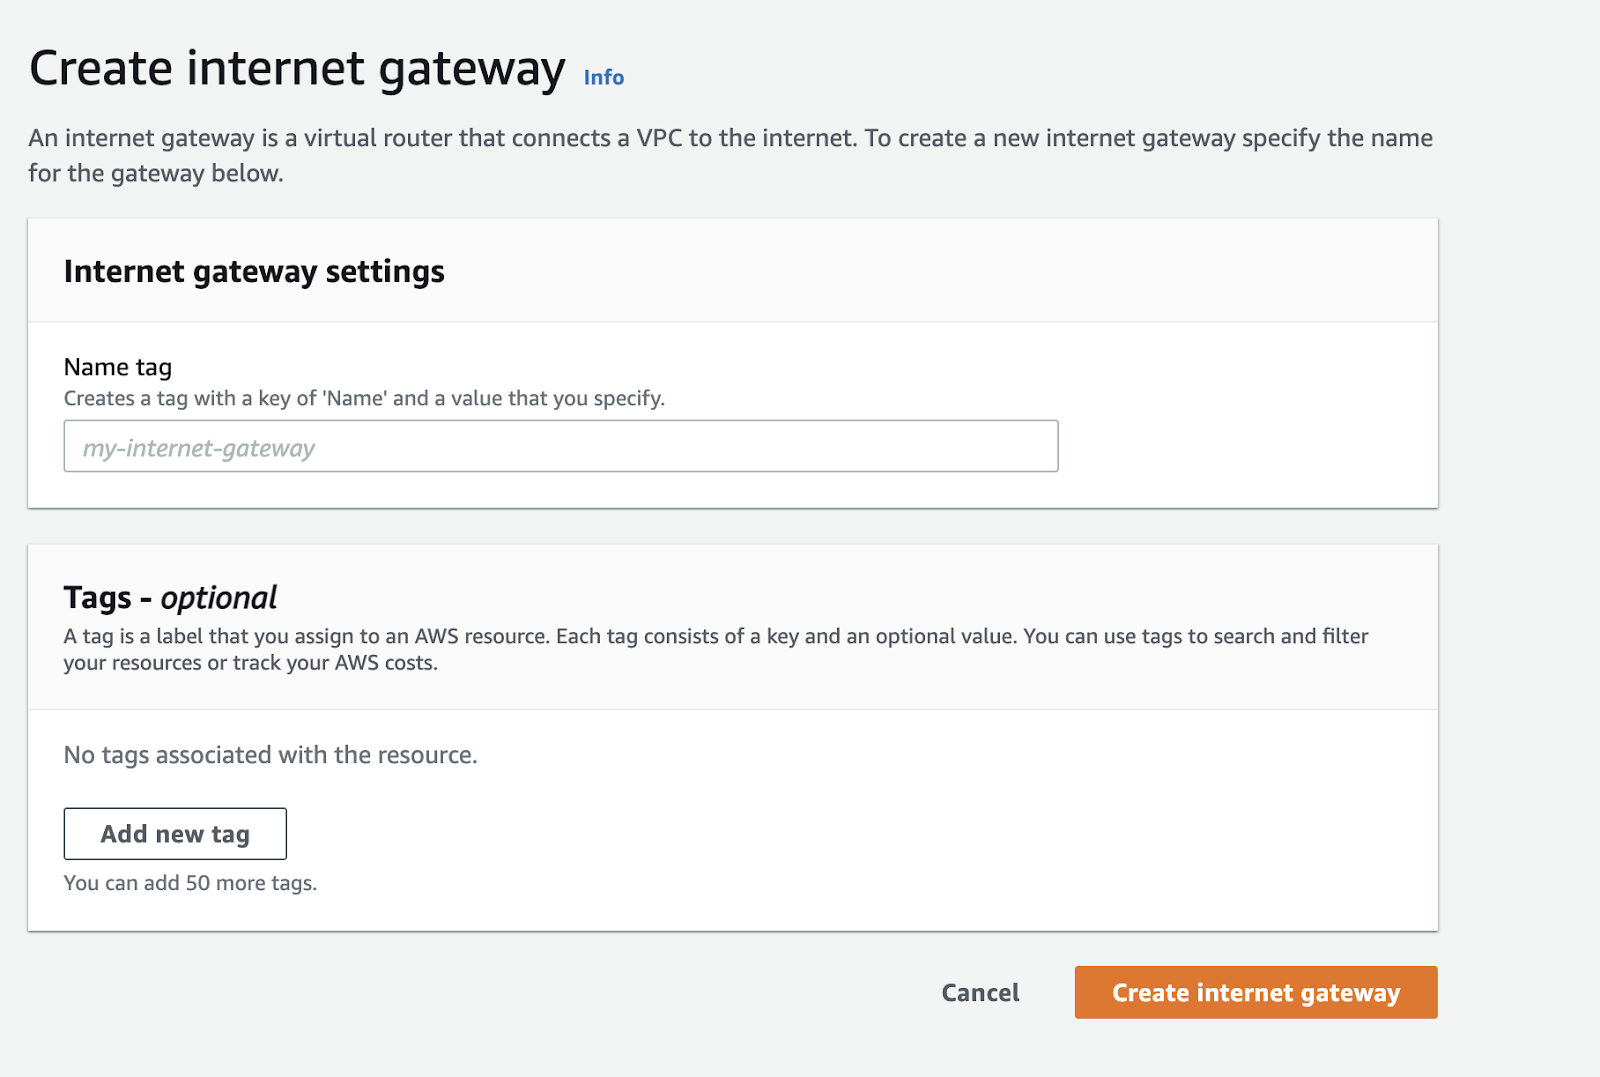
Create Internet Gateway Dialog
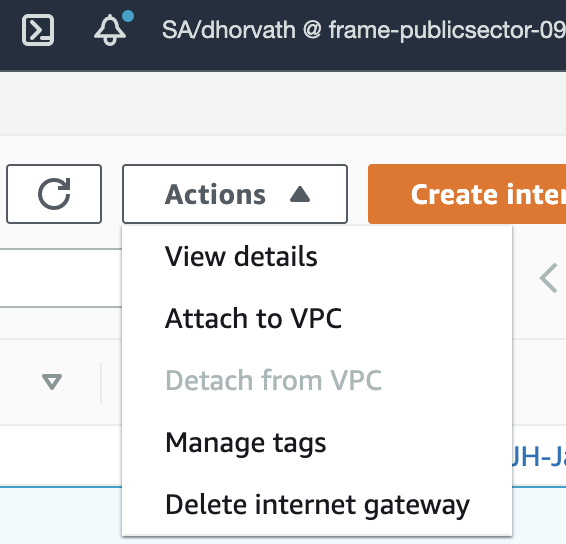
Attach the Internet Gateway to the VPC
Create a NAT Gateway
The next step is to create a NAT gateway and put it on the “public subnet” created above.
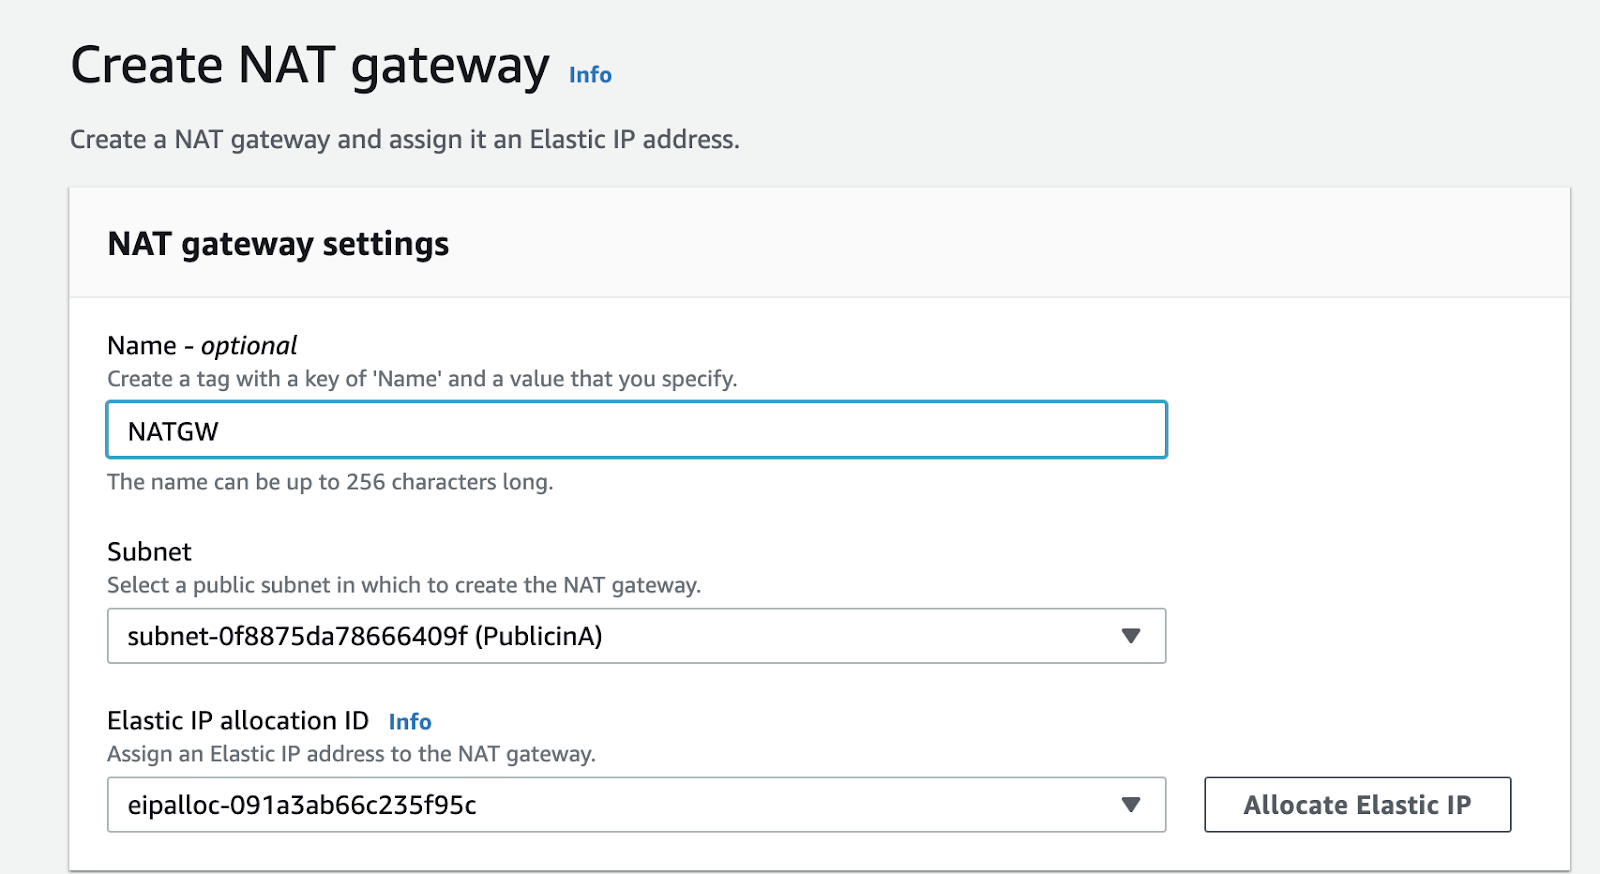
Create NAT gateway Dialog
Allocating an Elastic IP ensures that the NAT gateway’s public IP does not change even if the NAT gateway instance goes down and is restored.
RDP Bastion
To confirm the operation of the Frame workloads, I need a workstation on the private network. Since I don’t have a private infrastructure to connect my VPC to, I created a Windows instance on the public subnet and assigned it an elastic IP. In this case, I also set up the security group to limit the public IPs that could connect to the Windows instance as an additional security measure. In a “normal” private network, this RDP Bastion would not be necessary, since users could use workstations on the private network and be able to route from your private network to your VPC over a private connection to access the Frame workloads.
Route Tables
In my test environment, I needed to create two route tables: one to route the private subnets network traffic destined for the internet to the NAT Gateway that I created; another to route the public subnet’s internet traffic to the Internet Gateway.
The public subnet route table is seen below.
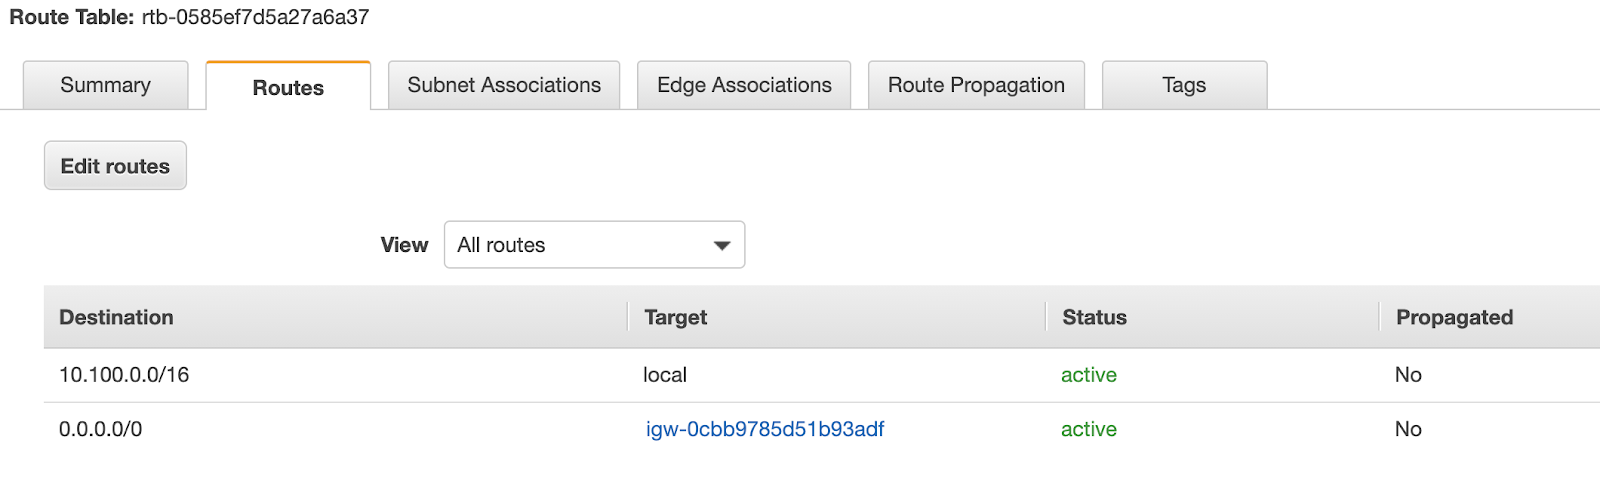
Public Subnet Route Table
The private subnet route table is seen below.
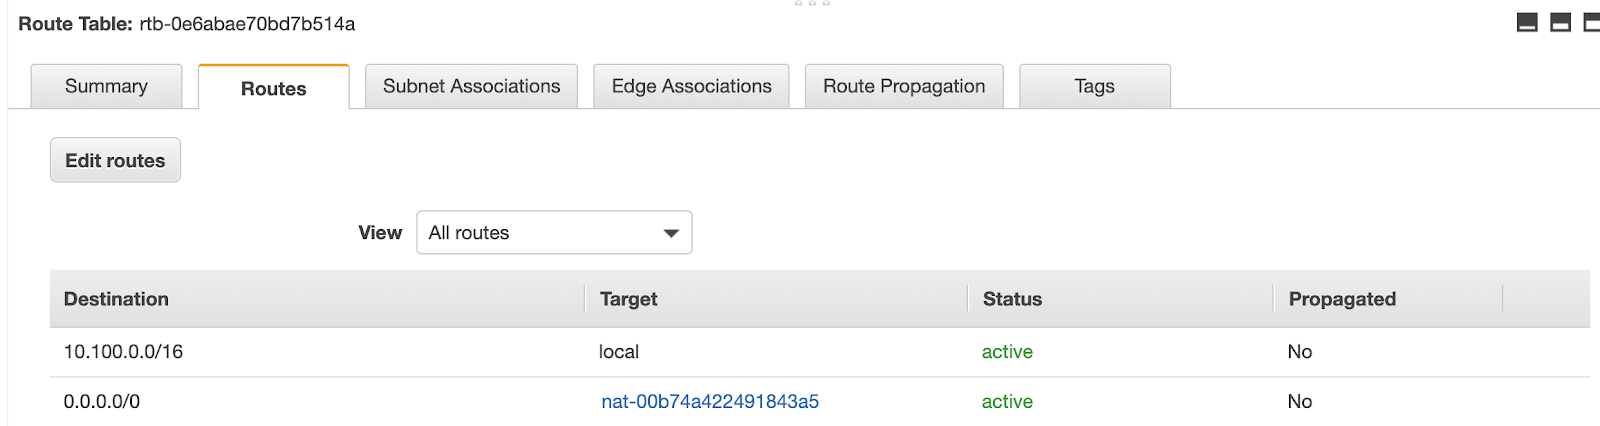
Private Subnets Route Table
In a more extensive private network, additional routes might be needed to route traffic to the appropriate AWS VPC Peer, Transit GW, or VPN.
Security Groups
The final thing we need to do is define the security group that the Frame platform will assign to the resources the Frame platform creates. With the Release of Frame Guest Agent (FGA) 8.x we no longer need to allow inbound traffic on port 8112, so the inbound security group becomes simpler.
The security group simply needs to allow inbound HTTPS traffic from all machines that are going to connect to the Frame workloads. In this case, it would be all of the machines on the private subnet. To make it simple in my test, I simply allowed all the IPs within the VPC’s CIDR to establish inbound connections on these two ports as seen in the following figure.
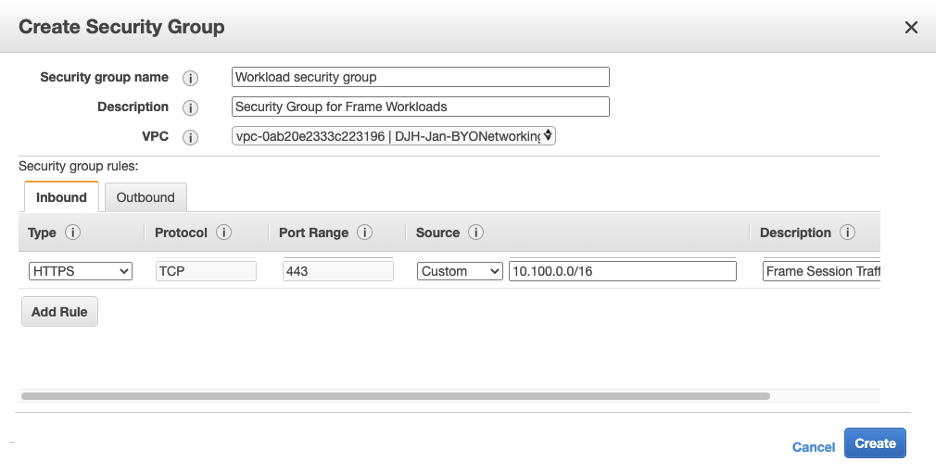
Frame Workload Security Group
Create the New Frame Account
The AWS private networking setup is complete and I now have all the information necessary to set up my Frame BYO Networking account. I have already registered my AWS subscription to my Frame organization entity. If you need information on how to add an AWS subscription to your Frame customer or organization entity, those instructions can be found here.
In the “Create Account Dialog,” I choose the correct cloud provider (e.g., AWS) and region (e.g., Ohio) and then select the “BYO Networking” radio button, as seen below.
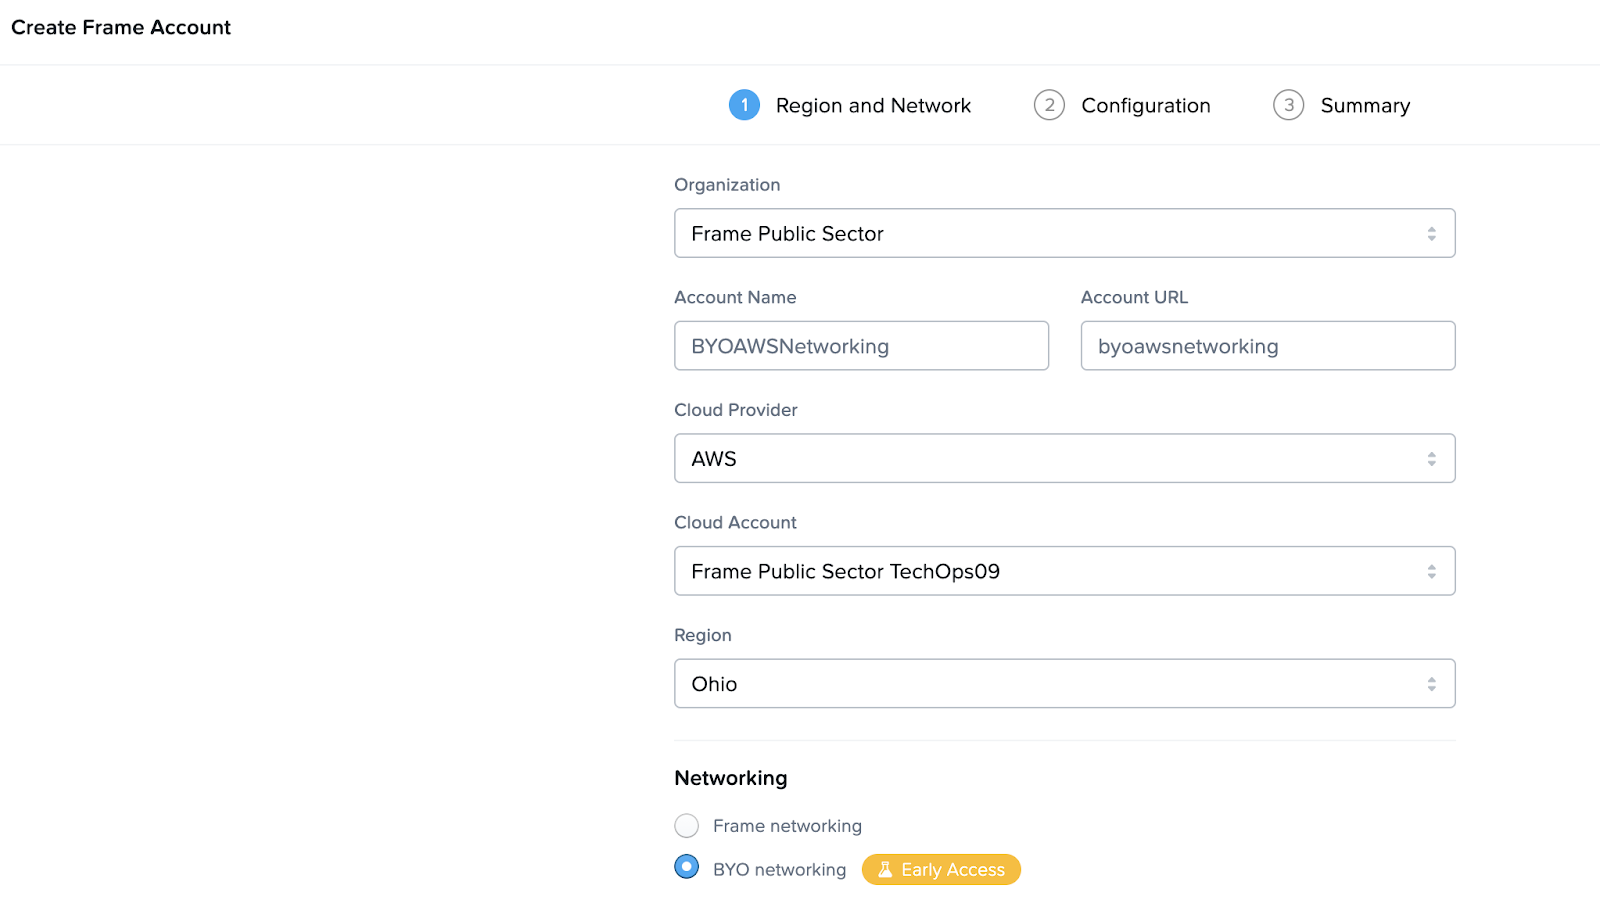
Frame Account Creation
Then I select the right VPC, subnets, and security groups from the dropdowns and hit “next,” as seen below.
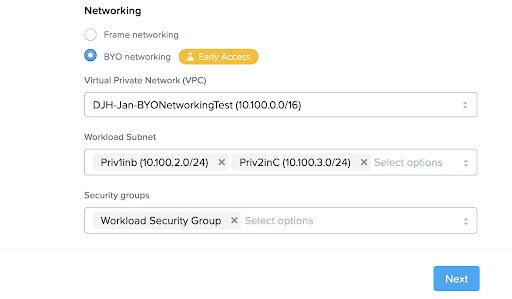
Select the Private networking configuration
Now I can select my sandbox image and instance type and hit Next twice to create my Frame account.
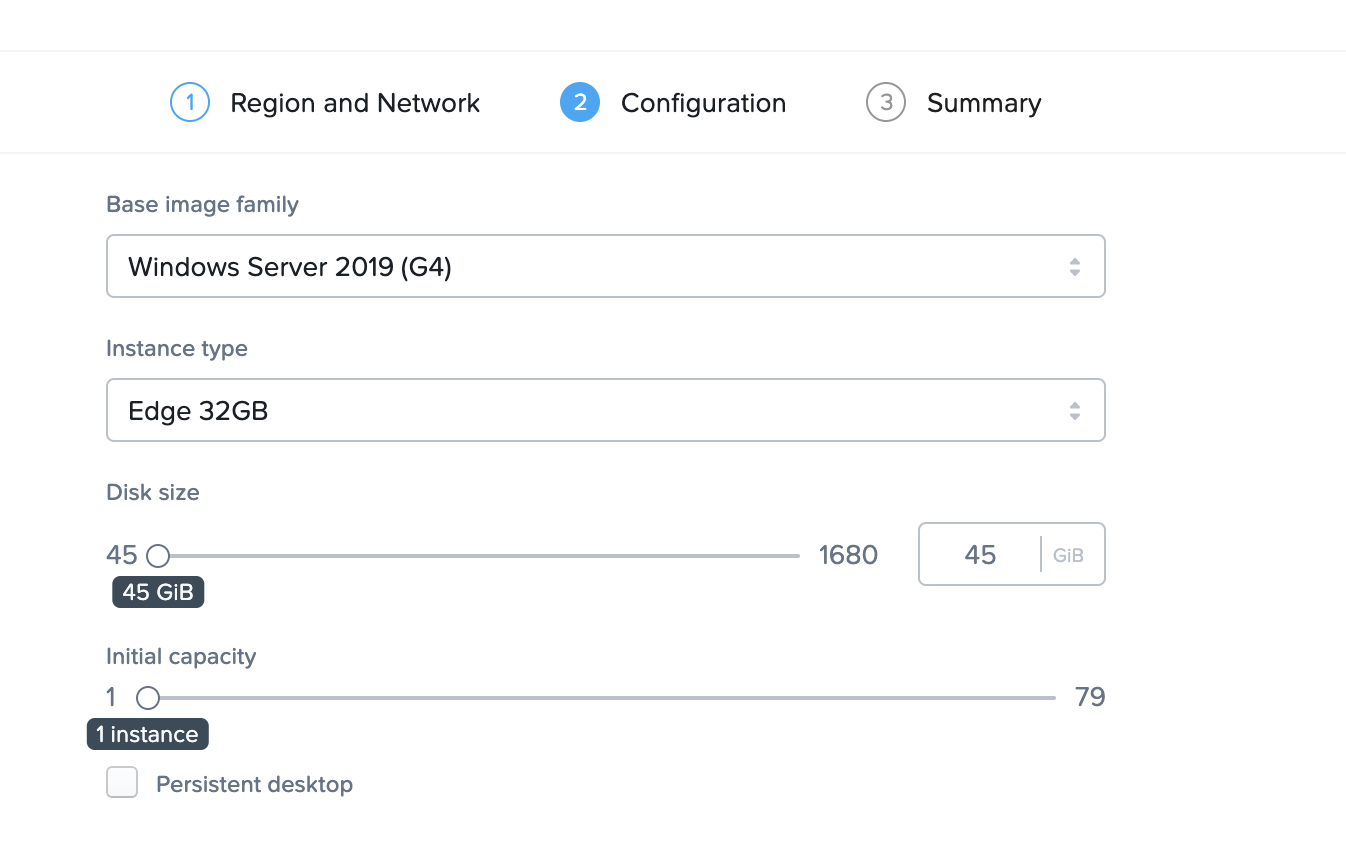
Frame Sandbox Configuration
Once Frame has provisioned my Frame account in the designated private subnets, I will see in the AWS Console the resources outlined above: namely, an internet and NAT GW; a WCCA for each Frame Account created, and some workloads on the private subnets.
Congratulations, You’ve Made it Through!
That is it! After a few minutes, my Frame account is created and ready to use. Only machines on the private network can connect to Frame sessions, so RDP’ing into the Bastion, starting up a browser, and logging into Nutanix Console are required to start a Frame session on a workload VM in one of the private subnets. You can add a second Frame account if there are sufficient IP addresses for all the workloads. If remote access with the RDP host is not desired, a “Streaming Gateway Appliance'' can be set up to provide that access, which will be covered in my next blog.
David Horvath is a Senior Solutions Architect with Nutanix Frame. He has been a part of the Frame team for almost 4 years and prior to that spent 20 years consulting on various Information Technology projects with the US Intelligence Community.
© 2021 Nutanix, Inc. All rights reserved. Nutanix, the Nutanix logo and all Nutanix product and service names mentioned herein are registered trademarks or trademarks of Nutanix, Inc. in the United States and other countries. All other brand names mentioned herein are for identification purposes only and may be the trademarks of their respective holder(s). This post may contain links to external websites that are not part of Nutanix.com. Nutanix does not control these sites and disclaims all responsibility for the content or accuracy of any external site.
This post may contain express and implied forward-looking statements, which are not historical facts and are instead based on our current expectations, estimates and beliefs. The accuracy of such statements involves risks and uncertainties and depends upon future events, including those that may be beyond our control, and actual results may differ materially and adversely from those anticipated or implied by such statements. Any forward-looking statements included herein speak only as of the date hereof and, except as required by law, we assume no obligation to update or otherwise revise any of such forward-looking statements to reflect subsequent events or circumstances.